Guides
- Adobe
- Applications/Programs
- Canva staff access
- How to access Student Activity Locator (SAL)
- How to Clear Web Browser Cookies and Cache
- Installation and Licensing Guide: RealCAD 5.5
- Installation and Licensing Guide: RealCAD 5.5
- Unblocking Websites
- Webex App | Change your audio settings
- Authentication
- Adding a Mobile Phone as a Sign-In Method for 2FA
- Guest Wi-Fi Access – Warragul Regional College
- Set up the Microsoft Authenticator app
- AV-Equpment
- Chromebook
- Compass
- Internet Explorer mode in Microsoft Edge
- LMS
- MacOS
- Microsoft
- # How to Report Suspicious Emails in Outlook
- # ✅ How to Stop Microsoft Edge Opening PDFs (Make Them Open in Adobe)
- Find student email addresses in Outlook
- How to Access your Sticky Notes from Outlook.
- How to manage saved passwords in Microsoft Edge
- How to share Microsoft Forms with others by saving them as a template
- Microsoft Teams video training - Microsoft Support
- Minecraft Education Edition - Quick guide for staff
- Minecraft Education Edition - Quick guide for students
- Naming Microsoft Teams
- Organize your inbox in Outlook
- Prepare for Zscaler
- Re-enter Credentials After Password Change
- Scanning To OneDrive
- Staying safe online using Microsoft Family
- Papercut/Printing
- Parent Info
- Windows
- # Updating Saved Passwords for Network Drives and Printers
- Add an email account to Outlook
- Back up your folders with OneDrive
- Create and add an email signature in Outlook
- Device encryption in Windows
- Finding your BitLocker recovery key in Windows
- How to add SharePoint document library to file explorer
- How to Delete a Saved Wi-Fi Network on Windows
- How to Disable BitLocker Encryption on Windows 10 and 11
- How To Fix The app you're trying to install isn't a Microsoft-verified app On Windows 11
- How to Install Printer Windows
- How to Map a Network Share to a Drive Letter
- How to Map a Network Share to a Folder
- OneDrive sync problems
- Switching out of Windows S mode
- Task Manager No Longer opening after running NAPLAN
- Touch Screen stopped working after running NAPLAN
Adobe
How to Download and Install Photoshop
https://www.photoshopbuzz.com/how-to-download-install-photoshop/
How to download and install the Creative Cloud desktop app
https://helpx.adobe.com/au/download-install/kb/creative-cloud-desktop-app-download.html
Applications/Programs
Canva staff access

Canva is a design tool that helps you create assets for social media, websites, posters, PowerPoints and more.
Teachers and students can access Canvas premium features for free.
How to login:
- Simply access https://www.canva.com/
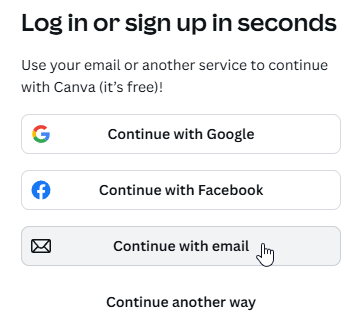
- Click Login

- Click Continue with email

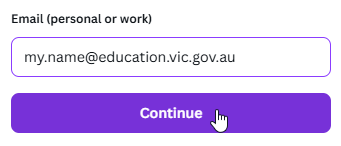
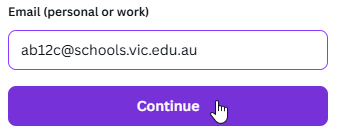
- Enter your @education or @schools email address and click Continue.


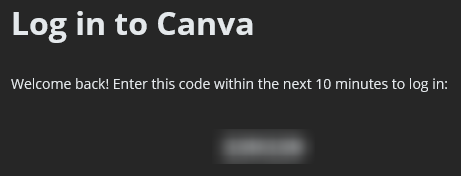
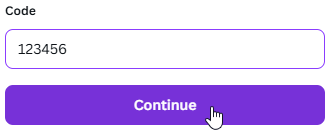
- You will receive an email with the subject "Your Canva code is xxxxxx". Open it and copy the code to your clipboard.

- Paste the code from your clipboard into the website's code field.

- You are now logged in to Canva. If you have any issues with your account, please contact the IT department.


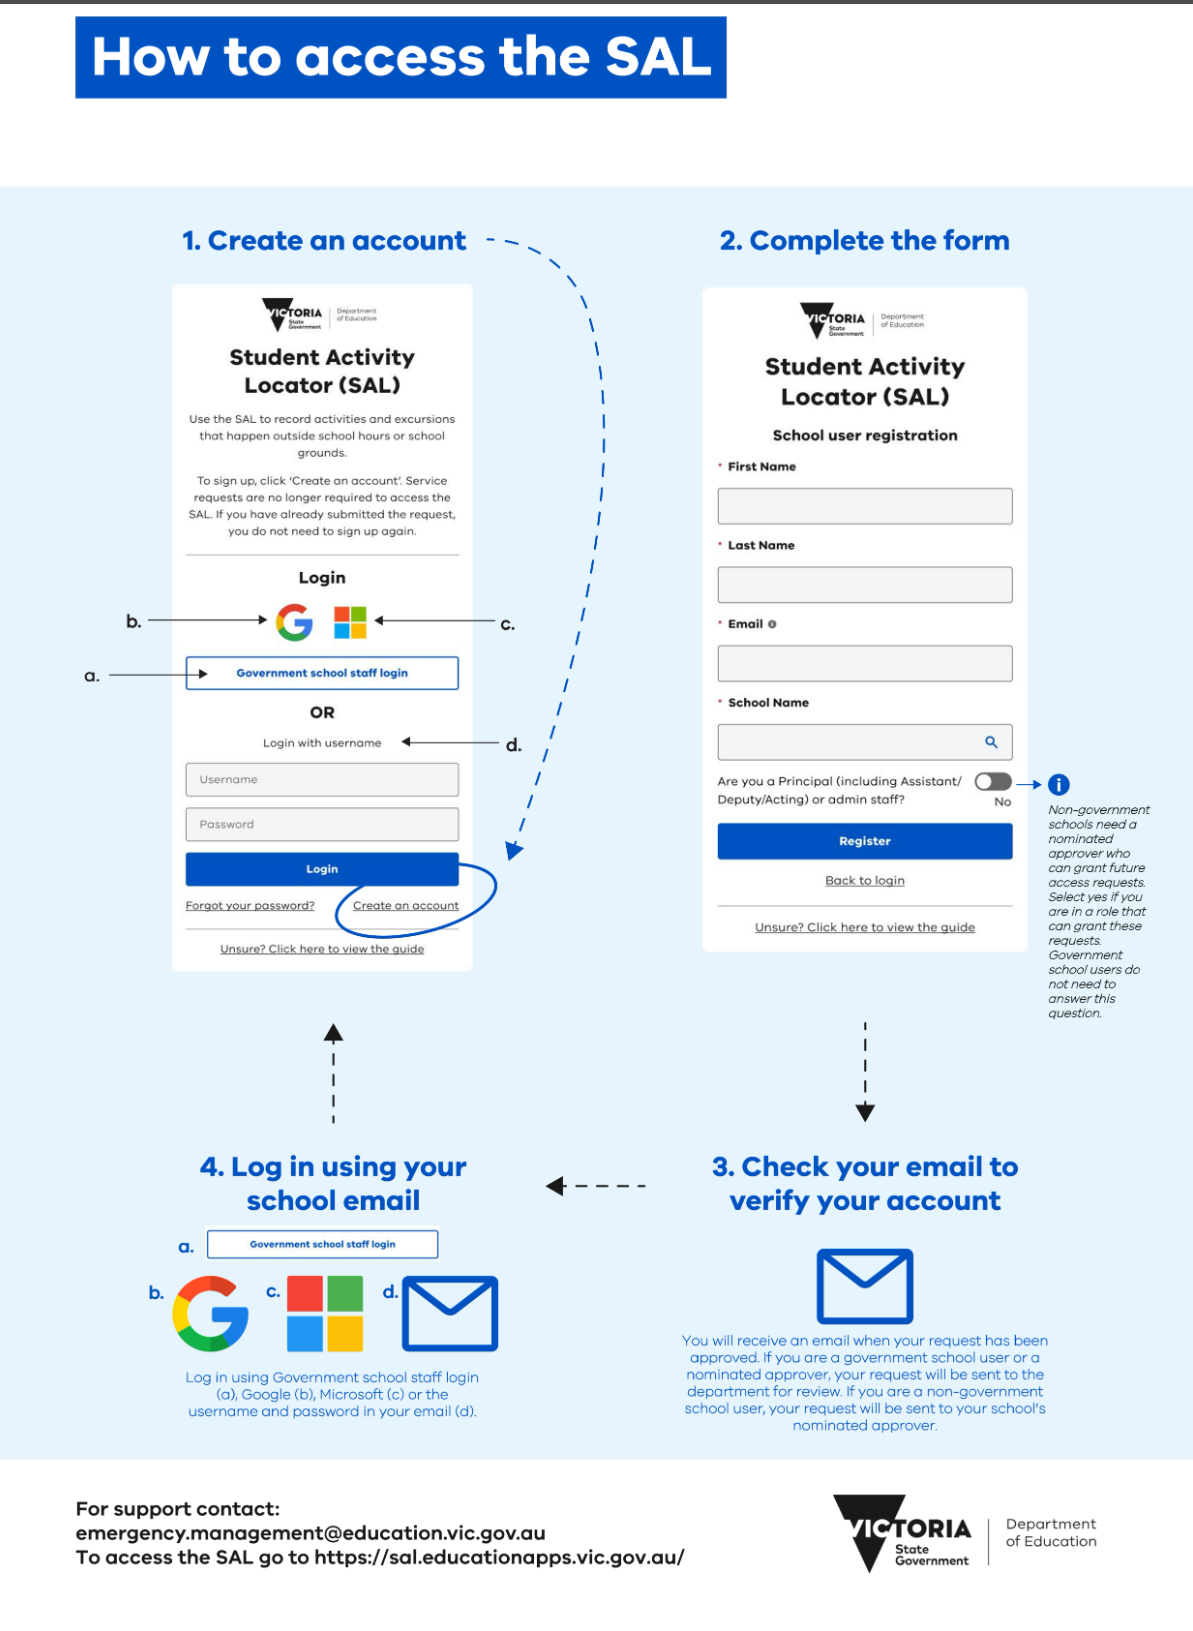
How to access Student Activity Locator (SAL)
How to Clear Web Browser Cookies and Cache
Below are step-by-step instructions for clearing cookies and cached files in common web browsers. Always ensure the relevant items are selected when clearing your data.
Microsoft Edge
Google Chrome
Brave
- Click the 3-line menu at the top right and select History.
- Select Clear recent history…
- Ensure the following items are checked:
- Cookies and site data
- Temporary cached files and pages
Mozilla Firefox
- Click the 3-line menu at the top right and select History.
- Select Clear recent history…
- Ensure the following items are checked:
- Cookies and site data
- Temporary cached files and pages
Opera
- Click the Opera icon at the top left and select History > Clear browsing data.
- Ensure the following items are checked:
- Cookies and other site data
- Cached images and files
Safari
- Click Safari at the top left, then select Preferences…
- Go to the Privacy tab and click Manage Website Data…
- Click Remove All
Installation and Licensing Guide: RealCAD 5.5
Step 1: Access the Installation Files
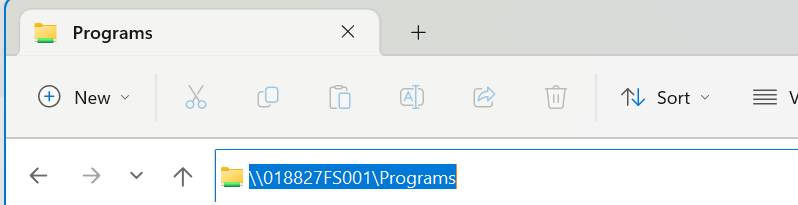
- Open File Explorer.

- In the address bar, enter:
\\018827FS001\Programs - If prompted to log in:
- Username:
DE username - Password: Your DE password
- Username:
- Navigate to the folder
RealCAD-v5.5and open it. - Double-click
RealCAD-v5.5-Installer.exeto start the installation. - Follow the on-screen instructions to complete the installation.
Step 2: License RealCAD 5.5
- Launch RealCAD 5.5 for the first time.
- Click Set License Key.
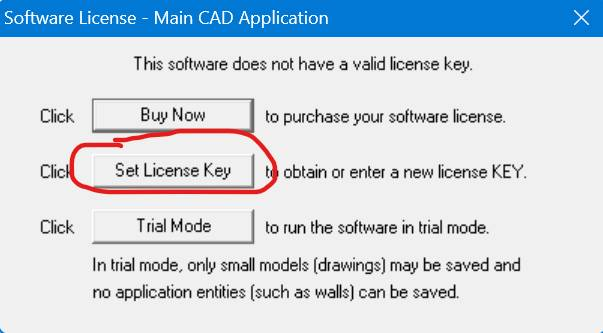
- Under Have you purchased?, select Yes.
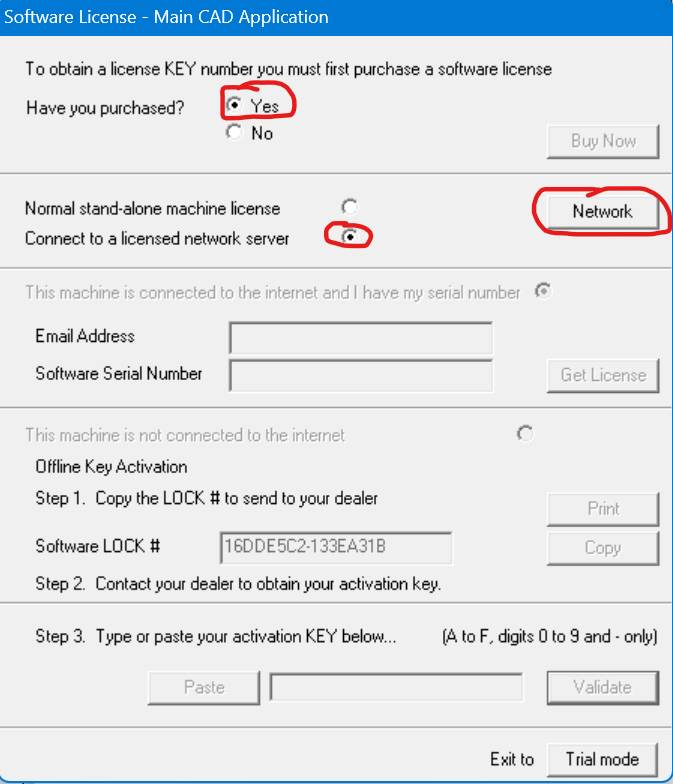
- Choose Connect to a licensed network server.
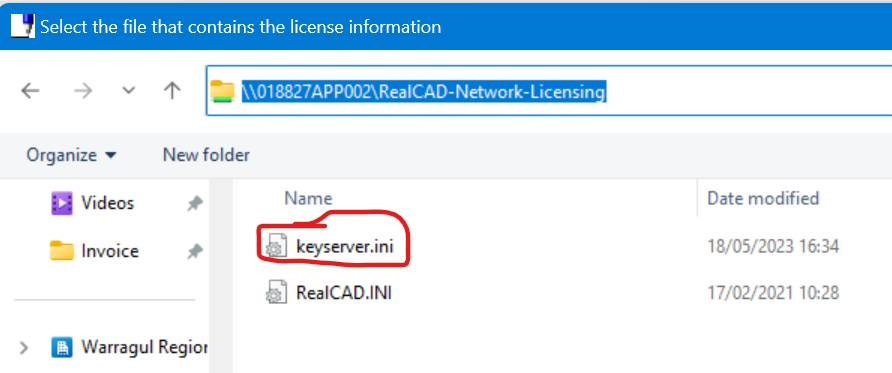
- Enter or copy the following into the address bar:
\\018827APP002\RealCAD-Network-Licensing
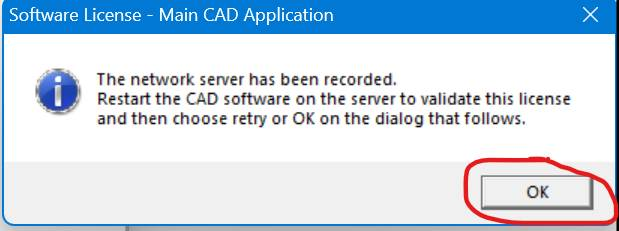
- Double-click
keyserver.ini. - Important: Do not click OK immediately. IT must restart the RealCAD 5.5 License Server to apply the license to your device. Once the license has been applied, RealCAD 5.5 is ready for use.

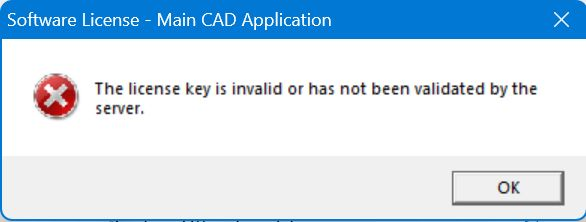
Step 3: Troubleshooting
If you receive an error message during licensing:
-
Create a support ticket: https://support.wrc.vic.edu.au/
- Sign in with your WRC account (not your email address)
-
Alternatively, email it@wrc.vic.edu.au requesting the RealCAD 5.5 License Server to be restarted.

Installation and Licensing Guide: RealCAD 5.5
Installation and Licensing Guide: RealCAD 5.5
Step 1: Access the Installation Files
-
Open File Explorer.
-
In the address bar, enter: \\018827FS001\Programs
-
If prompted to log in:
-
Username:
curric\<your WRC username>(e.g.,curric\abc1234) -
Password: Your WRC password
-
-
Navigate to the folder RealCAD-v5.5 and open it.
-
Double-click RealCAD-v5.5-Installer.exe to start the installation.
-
Follow the on-screen instructions to complete the installation.
Step 2: License RealCAD 5.5
-
Launch RealCAD 5.5 for the first time.
-
Click Set License Key.
-
Under Have you purchased?, select Yes.
-
Choose Connect to a licensed network server.
-
Enter or copy the following into the address bar: \\018827APP002\RealCAD-Network-Licensing
-
Double-click keyserver.ini.
Important: Do not click OK immediately. IT must restart the RealCAD 5.5 License Server to apply the license to your device. Once the license has been applied, RealCAD 5.5 is ready for use.
Step 3: Troubleshooting
If you receive an error message during licensing:
-
Create a support ticket: https://support.wrc.vic.edu.au/
Sign in with your WRC account (not your email address).
Alternatively, email it@wrc.vic.edu.aurequesting the RealCAD 5.5 License Server to be restarted.
Unblocking Websites
As of 2025, WRC IT no longer maintains a list of blocked/unblocked websites, nor do they have the power to action such requests.
The Department of Education now controls internet access and the allowing / disallowing of access to specific online resources.
If you believe you have been mistakenly blocked from accessing an online resource, a request can be submitted to review the resource in one of two ways (or both):
Service Request via DE Services Portal
This is the recommended and generally fastest way to have a website unblocked. You will receive a confirmation email from the DE service desk and can track the progress of your request online. Turnover time for requests varies but is generally from a day to a week.
Steps:
- Visit https://services.educationapps.vic.gov.au/ in your browser and login with your education credentials.
- Click Service Request, then select the School Technical Support category, then Service Request.


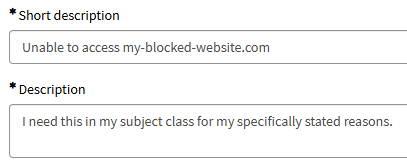
- Select the Zscaler Service Service and Website/Allow (Whitelist) Request Sub-Service.

- State your justification for the change in the short and long descriptions and click Submit.


Site Review via ZScaler
This method bypasses the Department of Educaton service desk and submits the request directly to the ZScaler team. You will not receive a confirmation email, only an alert once the resource has been reviewed, stating if the request was successful or not. Turnover time varies greatly, from a week to a month.
Steps:
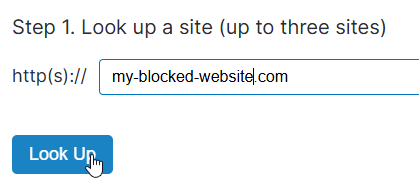
- Visit https://sitereview.zscaler.com/ in your browser.
- Enter the URL which you are unable to access and press Look Up.

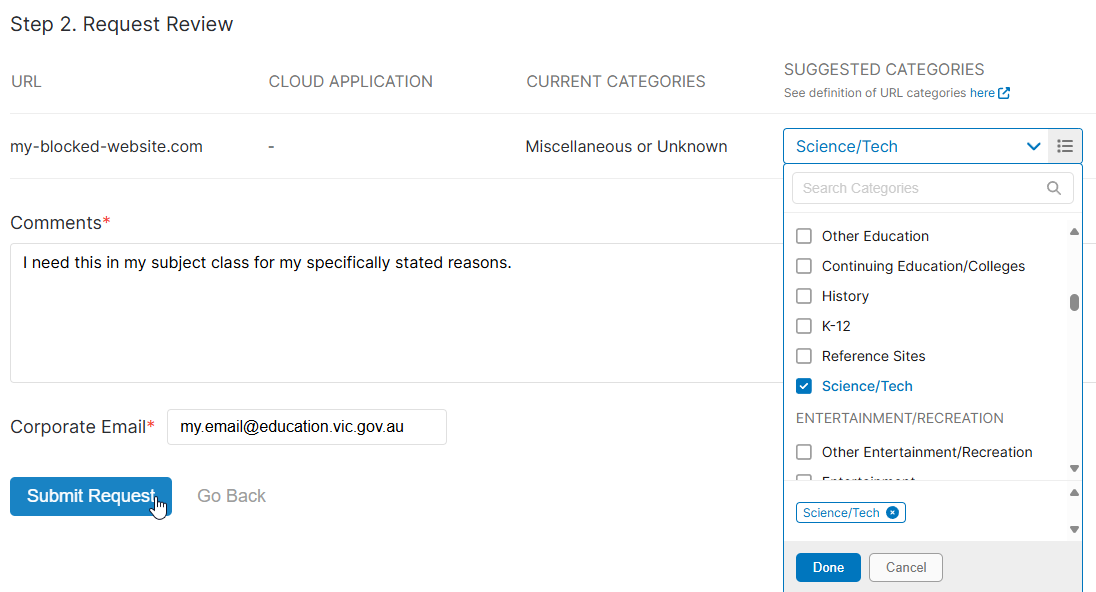
- Choose the appropriate category for the website and then click Done.
- State your justification for the change in the comments section and click Submit Request.

Webex App | Change your audio settings
https://help.webex.com/en-us/article/n139bv9/Webex-App-%7C-Change-your-audio-settings
Authentication
Adding a Mobile Phone as a Sign-In Method for 2FA
As all staff are required to have Two-Factor Authentication (2FA) set up on their @education accounts to access Compass and other services, IT strongly recommends adding your mobile phone number as an additional sign-in method alongside Microsoft Authenticator.
Why This is Important
- If you get a new phone, IT will not need to log a ticket with DE to reset your 2FA.
- Linking a mobile number allows you to reset your password easily using a verification code, without relying on security questions.
Step-by-Step Guide
Step 1: Access Security Info
- From the Staff or Admin dashboards, click the link to your Microsoft Account Security Info page.

- Sign in with your Education credentials.

Tip: Once signed in, you will see your existing security methods listed.
Step 2: Check Existing Methods
- If both Phone and Microsoft Authenticator appear, you’re all set.
- If not, continue to Step 3.


Step 3: Add Phone as a Sign-In Method
- Click Add Sign-in method.

- Select Phone.

- Enter your mobile number and set it to receive verification codes via SMS.

- Click Next.


Step 4: Verify Your Phone
- Enter the code you received via SMS.

- Click Next to continue.
- Click Done to finish setup.


Important Notes
- If you get a new phone or new phone number, update your Microsoft Account security methods immediately.
- For a new phone, you will need to remove and re-add the Microsoft Authenticator app, as data does not transfer automatically.
- For a new phone number, update your security settings to continue receiving SMS codes without interruption.
Following these steps ensures you always have reliable access to your account and can reset your password without delays.
Guest Wi-Fi Access – Warragul Regional College
To use the guest Wi-Fi network at Warragul Regional College, you need either a daily registration code or login credentials.
To obtain a code or credentials, please contact the WRC School IT Department.
Note: If you will be at WRC for more than 2 days, please see the IT department to have an account set up. This will allow you to connect without registering a new account each day.
Connecting with Credentials (Username & Password)
- Connect to the eduSTAR_Guest network.
- No password is required initially.
- Once connected, you will be redirected to a login or registration page.
- Enter the credentials provided to you and click Login.
- You should now have internet access.
- Tip: Save your username and password – you can use them to reconnect later without needing a new registration.
Connecting with a Daily Code
- Connect to the eduSTAR_Guest network.
- No password is required initially.
- You will be redirected to a login or registration page.
- Complete the registration form to create a temporary account for the day.
- Once registered, you will be emailed a username and password.
- Enter the provided credentials and click Login.
- You should now have internet access.
Important:
- Daily accounts are valid for one day only.
- If you register again on a different day, you must use a different username.
Additional Resources
- A DE-provided Self-Register Guide can be found here.
- For more information and user guides, please click here.
Known Errors / Issues
Error: End time is before current date/time
- This indicates a problem with your browser cache.
- Clear your cache and attempt registration again.
- If the issue persists, contact the IT department for assistance.
Set up the Microsoft Authenticator app
Set up the Microsoft Authenticator app as your verification method - Microsoft Support
AV-Equpment
How to Use the Auditorium (IAC) AV Switcher
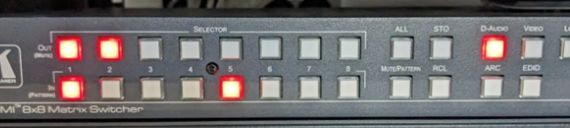
This guide explains how to connect laptops and the AV room desktop to the Auditorium AV system using the IAC AV switcher.
Important:
- The top row of buttons contains outputs.
- The bottom row of buttons contains inputs.
- Do not touch any equipment below the AV switcher unless you have consulted IT first.
Connecting a Laptop 💻
Laptop HDMI ports are available around the Auditorium:
- One on either side of the stage
- Atop the stairs below the AV room window
- Inside the AV room
Steps:
- On the input row (bottom row) of the AV switcher:
- Select your HDMI port number on the left side while Video is selected on the right side.
- Select the same HDMI port number on the left side while D-Audio is selected on the right side.
Tip: Make sure your laptop is powered on and connected to the correct HDMI port before selecting inputs.
Connecting the AV Room Desktop 🖥️
If using the desktop computer in the AV room, on the input row (bottom):
- Select Number 1 on the left side while Video is selected on the right side.
- Select Number 1 on the left side while D-Audio is selected on the right side.
Sending Output to the Projector 📽️
- On the output row (top) of the AV switcher:
- Select Number 1 on the left side while Video is selected on the right side.
- Select Number 1 on the left side while D-Audio is selected on the right side.
- Ensure the projector is powered on using the remote.
Note: There should be no need to press any other buttons on the projector remote. All AV functionality is controlled via the AV switcher.
Mirroring Your Laptop to the Desktop 💻 → 🖥️
- On the output row (top) of the AV switcher:
- Select Number 2 on the left side while Video is selected on the right side.
This allows your laptop screen to display on the AV room desktop.
Reminder: If you encounter any issues, contact the IT department before adjusting any equipment below the AV switcher.
Chromebook
Connecting a Chromebook to the eduSTAR Wireless Network
Follow these steps to connect your Chromebook to the eduSTAR Wi-Fi network.
Step 1: Select the Network
- Click the Wi-Fi icon in the bottom-right corner of your Chromebook screen.
- Select the "eduSTAR" network from the available networks.
Step 2: Configure Network Settings
- Change the EAP method to: PEAP
- Change EAP Phase 2 authentication to: MSCHAPv2
- Change Server CA Certificate to: Do not check
- In the Identity field, type your @schools username.
- In the Password field, type your @schools password.
- Leave Anonymous Identity blank.
- Ensure Save Identity and Password is checked.
Step 3: Connect
- Press Connect.
- Accept and continue through Google’s Terms of Service if prompted.
Step 4: Verify and Configure Proxy (if required)
Tip: If you experience connectivity issues, restart your Chromebook and repeat the steps above. Contact the IT department if problems persist.
Compass
# Student Guide: Booking an Appointment with Doctors in Secondary Schools (DiSS) in Compass
Warragul Regional College has set up Compass Conferences as the booking system for students to make appointments with the Doctors in Secondary Schools (DiSS) program.
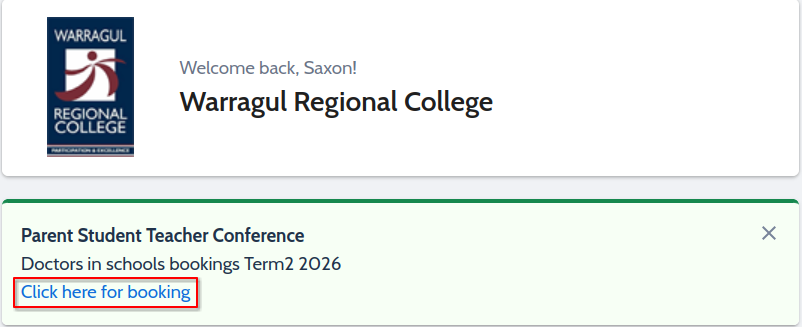
Option 1 — Booking from the Dashboard Alert
- Log in to Compass.
- From the Home Screen, look for an alert on your dashboard prompting you to make a booking.
- Click the hyperlink to begin the booking process.
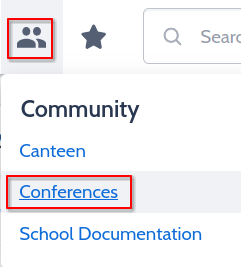
Option 2 — Booking Through the Community Tab
- Log in to Compass.
- Select the Community tab from the top menu.
- Click Conferences.
Finding the Correct Booking Cycle
-
You will be taken to the Conference Cycles page.
-
Find the cycle named:
Doctors in Schools Bookings – Term # Year
-
Press My Bookings next to the cycle name.
Making Your Booking
- You will then be prompted to either:
- Start Booking Now
- Show Me How to Book

-
Select Start Booking Now to continue making your appointment.
-
Follow the prompts to choose an available appointment time.
-
Confirm your booking when finished.
Need Help?
If you experience any issues booking your appointment, please contact the schools I.T Department for assistance.
Internet Explorer mode in Microsoft Edge
To turn on Internet Explorer mode, use the following steps.
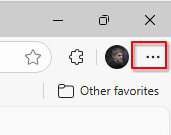
-
Click the three dots in the upper right corner of the browser window.

- Open the Settings option

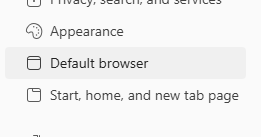
-
From the left sidebar, open the Default browser settings

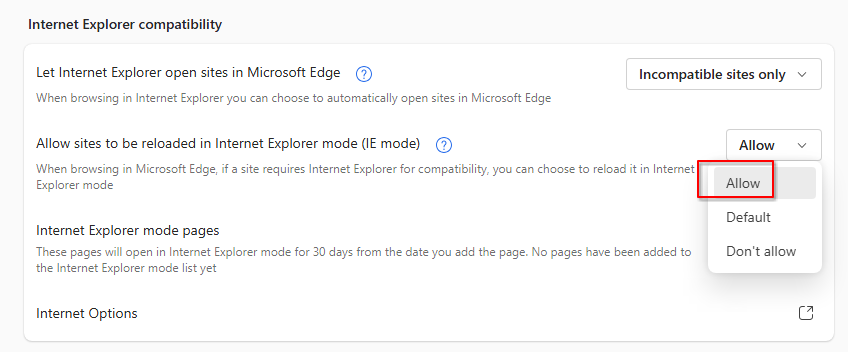
-
If not already configured, set Allow sides to be reloaded in IT mode to Allow

-
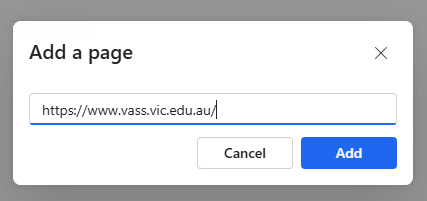
Click on the Add a page button and enter the URL of the website you need loaded in IE.

-
Visit the website and it should load in Internet Explorer Mode.

LMS
Canvas How do I generate a pairing code for an observer as a student?
MacOS
Update @education password for printers
Mac
Microsoft
# How to Report Suspicious Emails in Outlook
Stay Safe – Report Phishing Emails
If you receive a suspicious email, you can quickly report it using the Report Message button in Outlook.
Reporting suspicious emails helps protect everyone at Warragul Regional College.
Report Email in Outlook Desktop App
Step 1 – Open the Suspicious Email
Click once on the email you think may be suspicious.
- Outlook inbox with suspicious email selected.
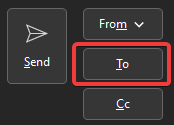
Step 2 – Click the “Report” Button
At the top of Outlook, click:
Report → Phishing

- Outlook ribbon showing the Report button.
Step 3 – Confirm the Report
A confirmation box may appear.
Click Report Phishing.
Step 4 – Email is Sent to Microsoft for Analysis
The email will be:
- Removed from your inbox
- Sent to Microsoft for review
- Used to improve spam and phishing protection
✅ You’re done!
- Success confirmation message.
Tips to Stay Safe
✅ Do not click suspicious links
✅ Do not open unexpected attachments
✅ Double-check sender email addresses
✅ When unsure, report the message
Need Help?
If you are unsure whether an email is safe:
- Report the message using the steps above
- Contact your IT support team at it@wrc.vic.edu.au
Microsoft Reference
Official Microsoft Guide:
https://learn.microsoft.com/en-us/defender-office-365/submissions-outlook-report-messages
# ✅ How to Stop Microsoft Edge Opening PDFs (Make Them Open in Adobe)
By default, Microsoft Edge often opens PDF files inside the browser.
Follow these steps to make PDFs download instead, so they can open in Adobe Acrobat Reader.
Step-by-Step Guide (Easy Method)
1. Open Microsoft Edge
- Click the Edge icon on your computer.
2. Open Settings
- Click the three dots (⋯) in the top-right corner.
- Select Settings
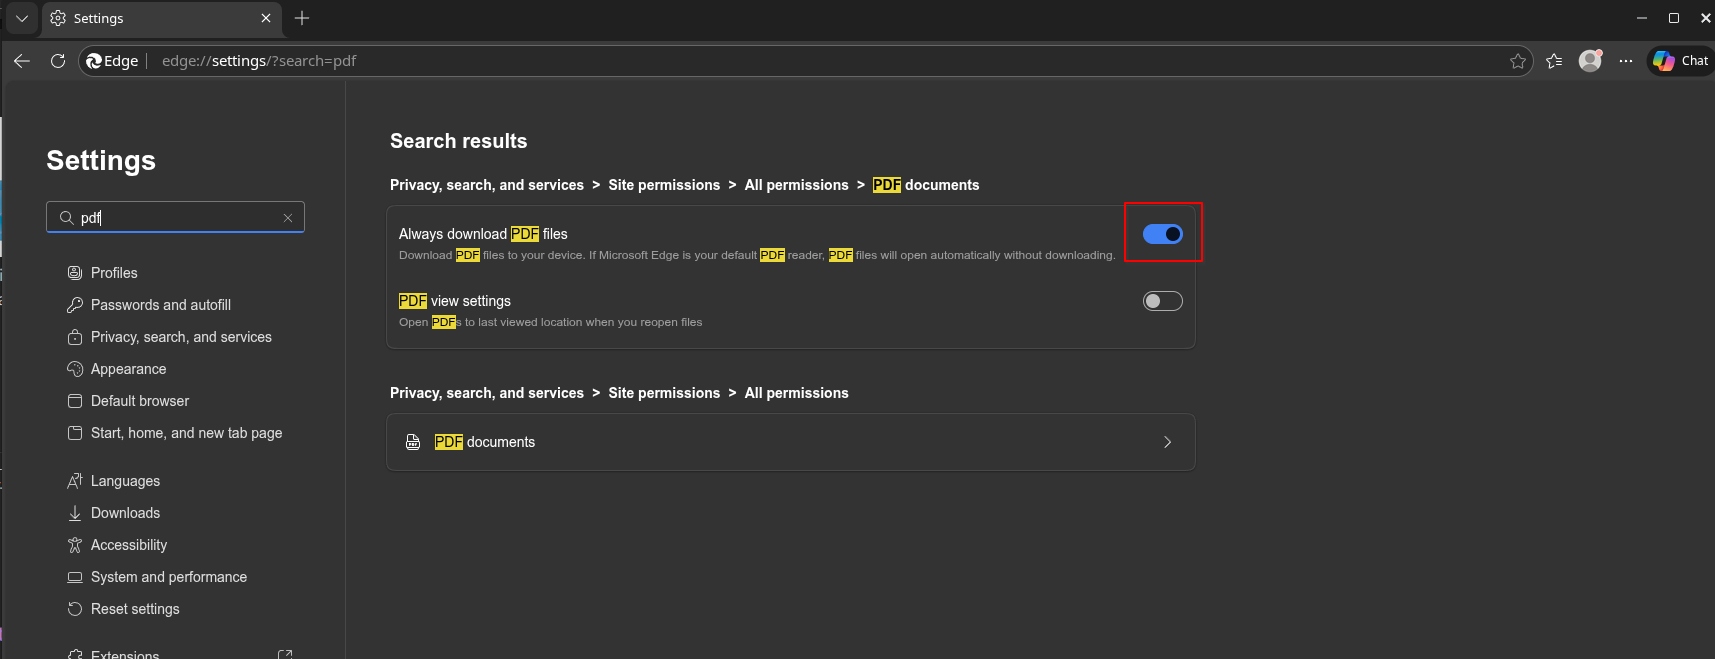
3. Search for PDF Settings
Instead of clicking through menus:
- Click in the Search settings box on the left
- Type:
PDF
This will quickly bring up the PDF options (as shown in the screenshot).
4. Turn On “Always Download PDF Files”
Under PDF documents, switch on:
✅ Always download PDF files
✅ What This Does
Once enabled:
- PDFs will no longer open inside Edge
- They will instead download automatically
- Staff and Students can then open them using Adobe Acrobat Reader
Optional Extra Step (Recommended)
To ensure Adobe opens PDFs by default:
- Right-click any PDF file
- Select Open with → Choose another app
- Choose Adobe Acrobat Reader
- Tick:
✅ Always use this app to open PDF files
✅ Finished!
Now PDFs will download and open in Adobe instead of Edge.
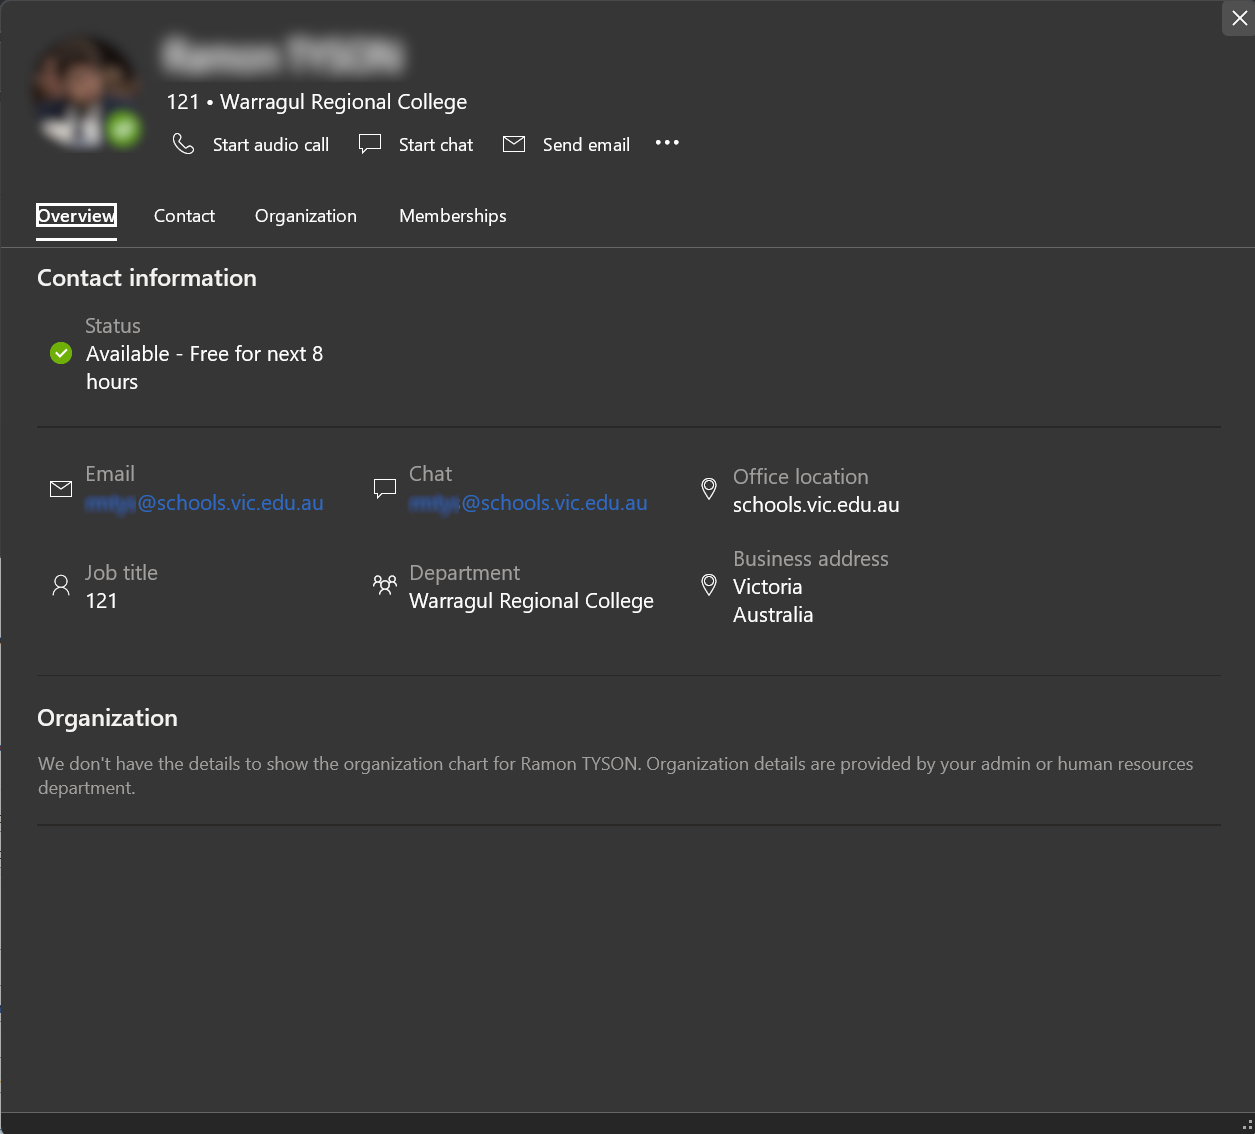
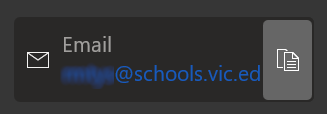
Find student email addresses in Outlook
Visibility of students is restricted by default in the Microsoft Outlook Address Book.
To find students at school, you will need to change the scope you are looking at in the Address Book.
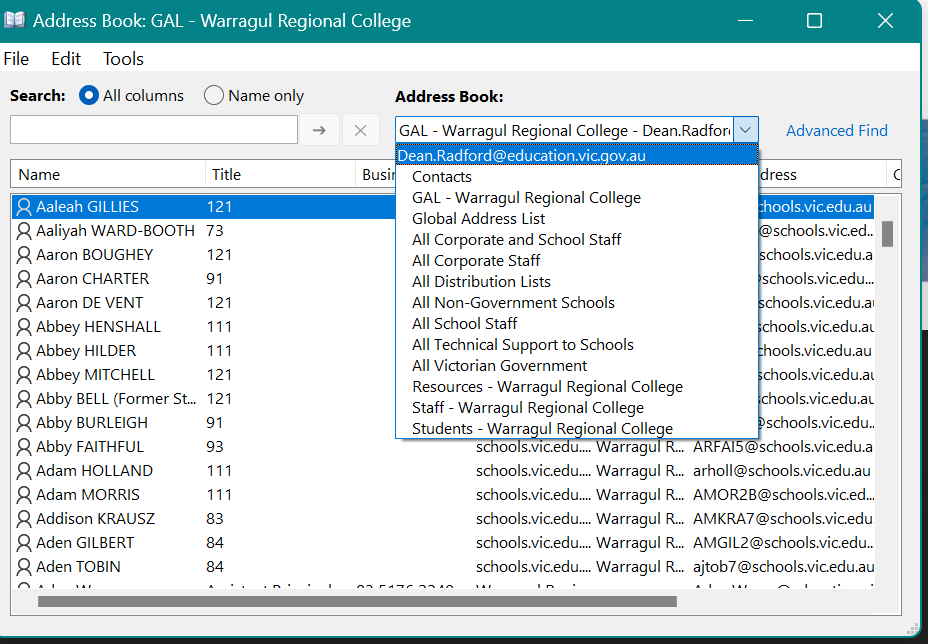
Use any method to open your address book:
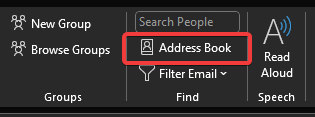
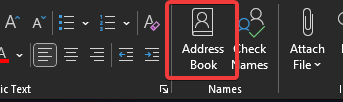
Select the Address Book drop-down menu and select Students - Warragul Regional College:
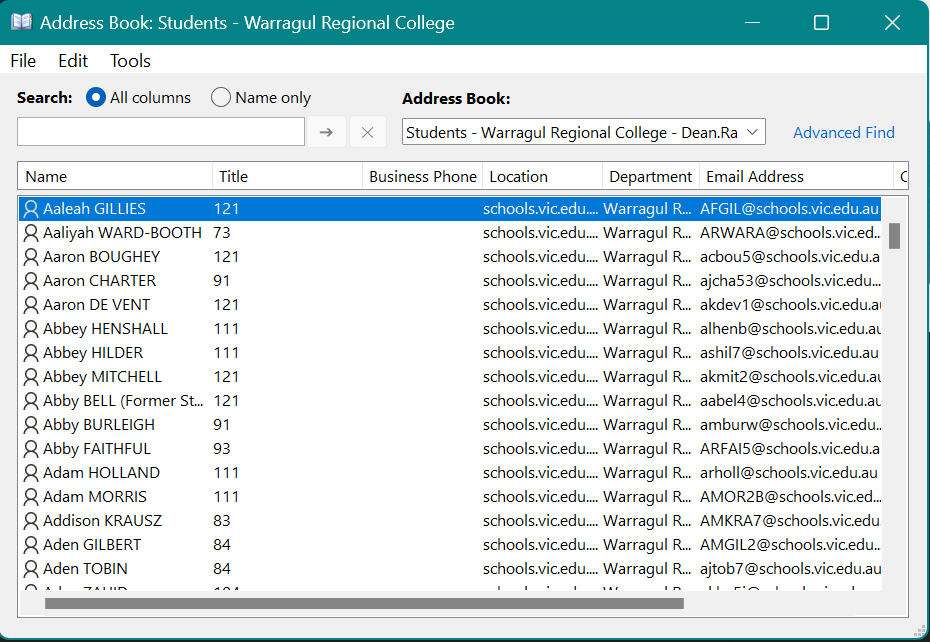
All students enrolled at WRC will be displayed. You can search specific students using the search field:

Open the entry to display information about the student:
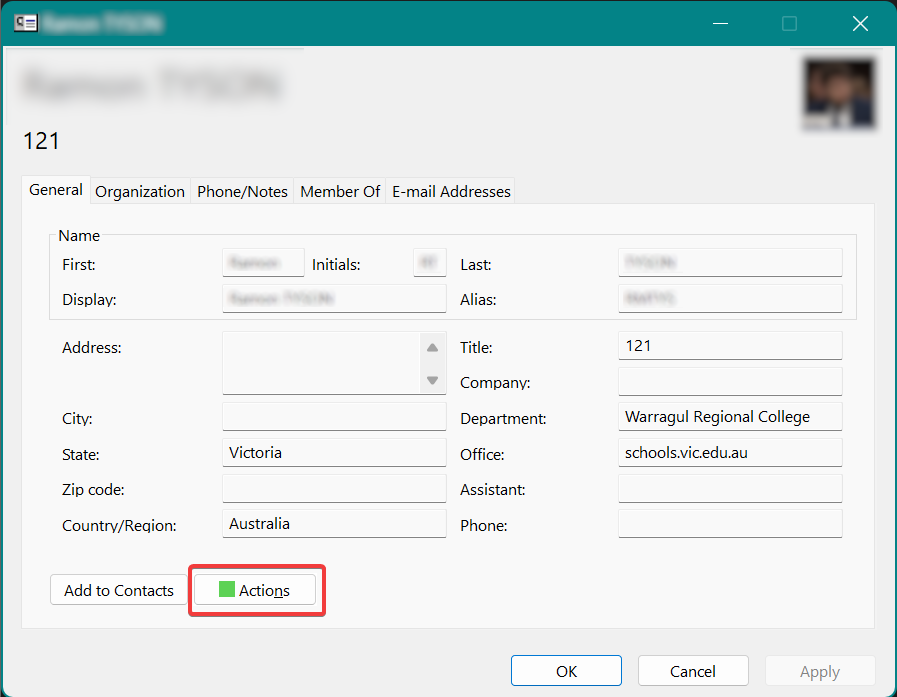
Click Actions to see a contact card with the students email address:
How to Access your Sticky Notes from Outlook.
To view your Sticky Notes in Outlook desktop app:
1. Open Outlook and, if you haven't already done so, add your Microsoft account to Outlook. (From File menu, click Add Account and then follow the onscreen instructions to add your MS Account).

2. After adding your MS account, click on More apps iconimage on the sidebar and click Notes, to view your Sticky Notes in Outlook.

To view your Sticky Notes in Outlook for web:
1. Go to Outlook.com and log in with your Microsoft account.
2. From the left-side navigation panel, click Notes under the Folders section.

3. Here, you can access all your synced notes. By right-clicking on the sticky note, you can easily copy its contents and paste them somewhere else if required.

Tip: If you accidentally deleted one of your sticky notes, you can also easily restore them from Outlook. Just go to the Deleted Items folder, select the deleted note and click the Restore button on the Toolbar.
THIS HOW TO IS FROM https://www.wintips.org/
How to manage saved passwords in Microsoft Edge
How to manage saved passwords in Microsoft Edge - Microsoft Community
How to share Microsoft Forms with others by saving them as a template
Microsoft Teams video training - Microsoft Support
Minecraft Education Edition - Quick guide for staff

Minecraft Education Edition - Quick guide for students

Naming Microsoft Teams
When creating new Microsoft Teams, please remember to use the naming convention "8827-nameofteam." This will make finding the team a lot easier and will prevent naming conflicts. Additionally, please add the account 8827-apps@schools.vic.edu.au as an owner. This way, I.T. can help with any issues that may arise.
do not name a team as follows:
VICEDU - YEAR 7 CAMP 2025
CREEK CAMP 2025
Correct Naming:
8827-Year-7-Camp-2025
8827-Creek-Camp-2025
Organize your inbox in Outlook
Organize your inbox in Outlook Windows
How to use Outlook rules to easily organize your inbox
How to Automatically Sort Emails Into Specific Outlook Folders
Prepare for Zscaler

Background:
Proxies are a way to tell your computer where the internet is, provide content filtering and more.
They have been used in schools for many decades, but in ~2020 the Department of Education decided to move away from the proxy model to a direct internet service model (Zscaler). This means the responsibility of internet filtering will be moved away from school systems to the DE instead, with increased internet speed and performance.
Actions Required:
If your device has proxy settings configured manually, they will need to be removed.
After completing this action, you will have student access / filtering until after the school migrates to Zscaler.
Windows
Open the start menu. ![]()
Search for proxy and open Proxy settings.
Ensure that automatically detect settings is set to ON.
Ensure setup script is set to OFF.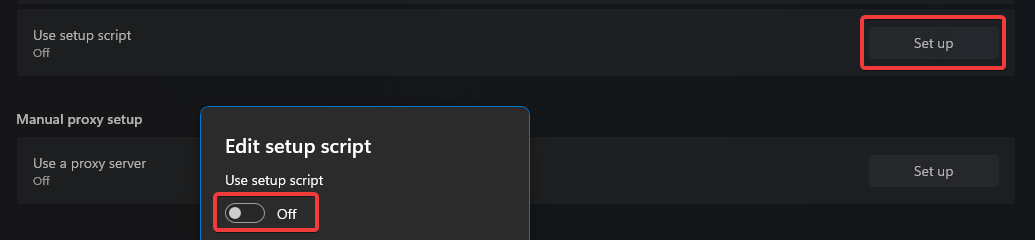
Ensure manual proxy setup is set to OFF.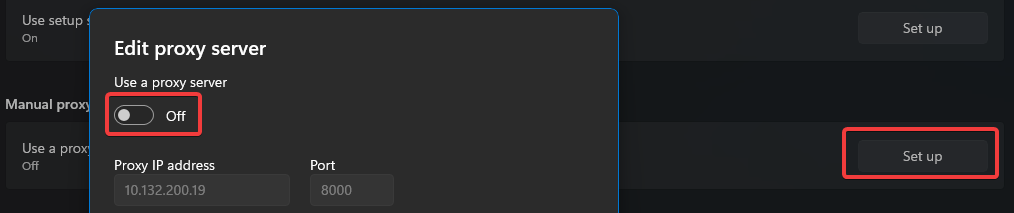
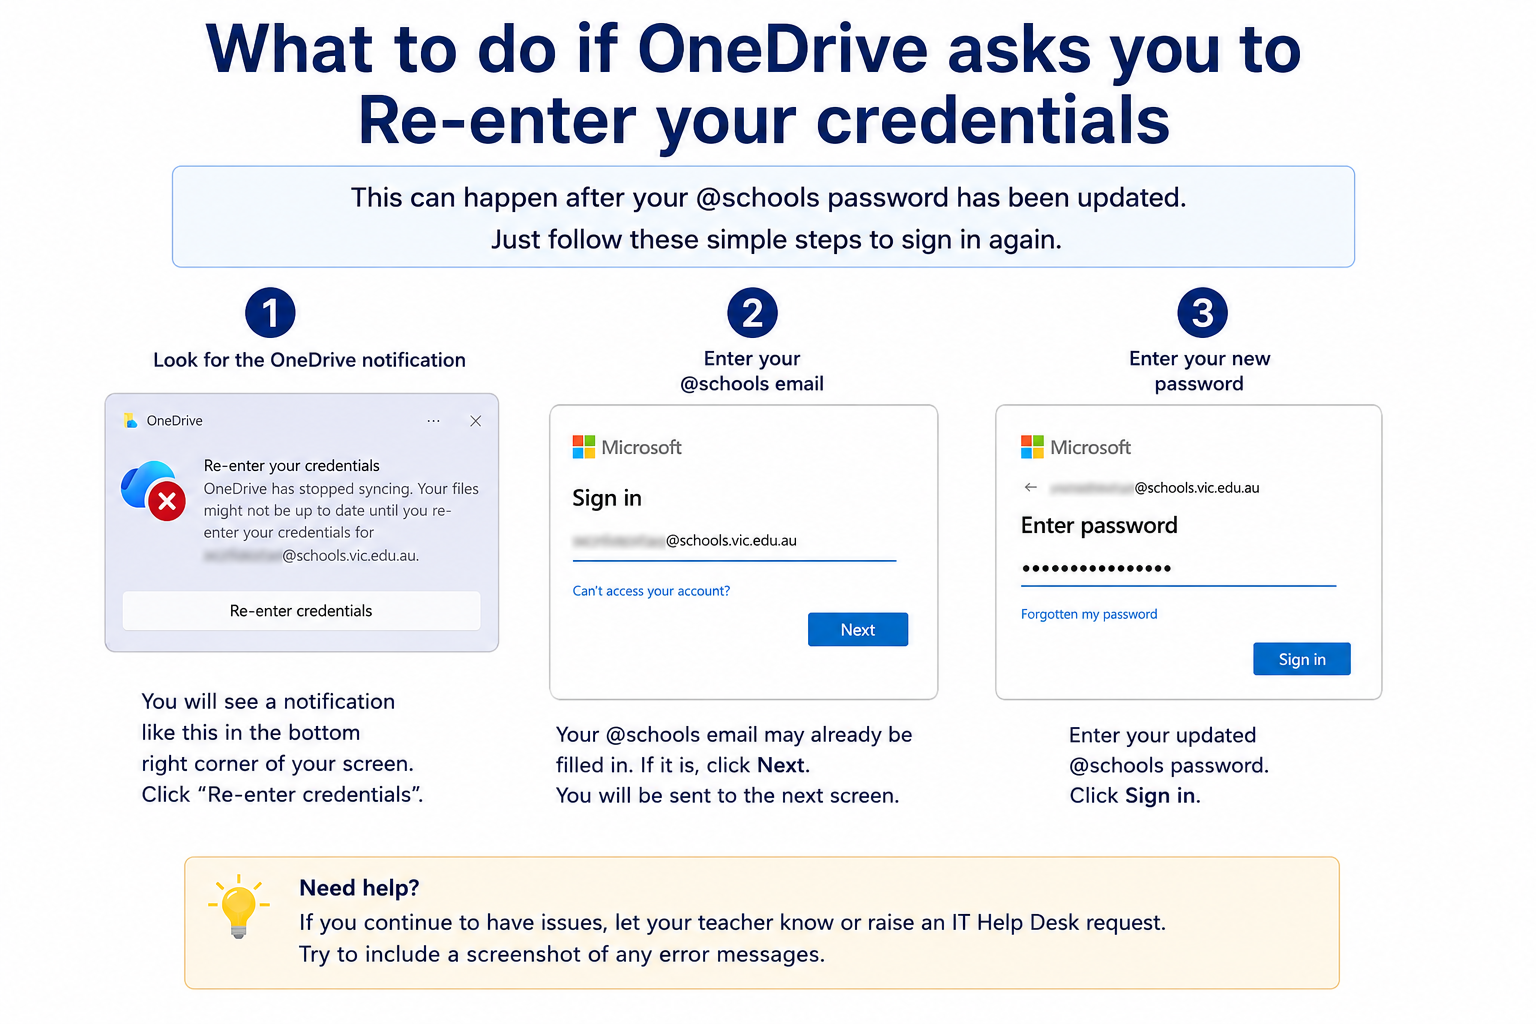
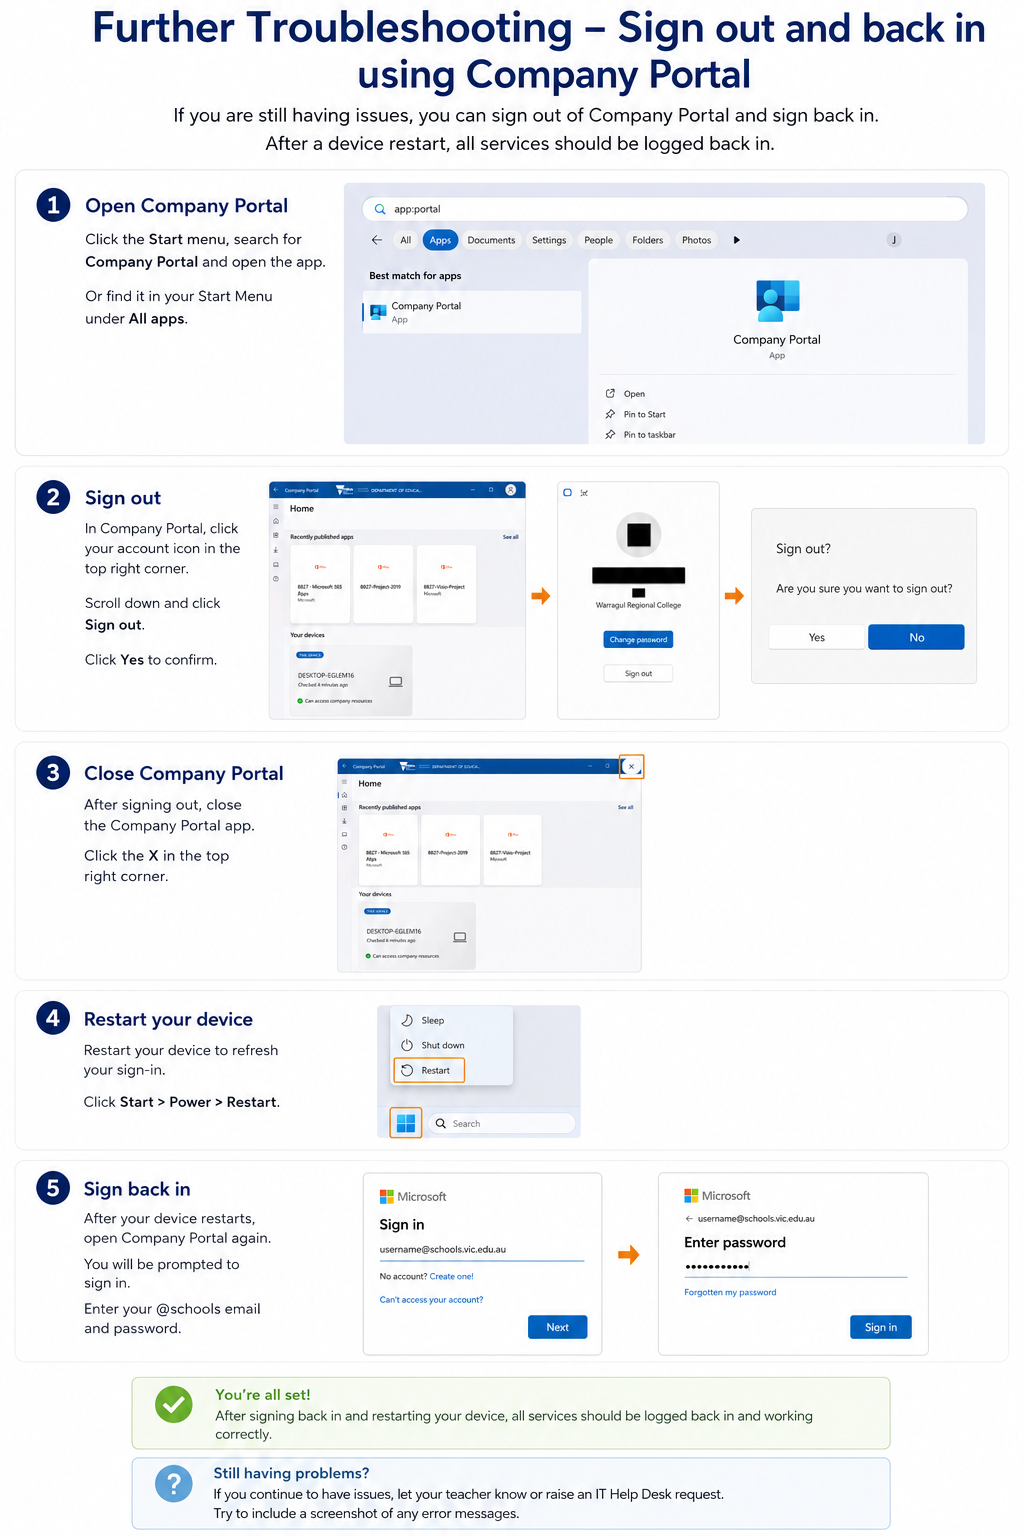
Re-enter Credentials After Password Change
Scanning To OneDrive
To use this option, you will need to perform a once-off authorization with Papercut. This authorization will come in the form of an email to your DET email address:
The scan should now appear in your OneDrive folder. under C:\Users\username\OneDrive - Warragul Regional College\Apps\Scans for PaperCut MF
Staying safe online using Microsoft Family
Microsoft Family Safety | Microsoft 365
Papercut/Printing
Parent Info
Windows
# Updating Saved Passwords for Network Drives and Printers
If you have recently changed your @education or @schools password, you may need to update the saved password in Credential Manager to regain access to your network drives and printers.
Windows Instructions
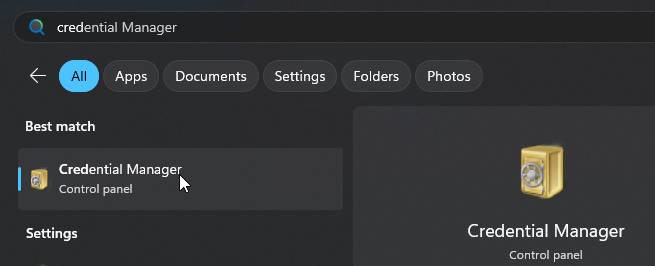
Step 1 — Open Credential Manager
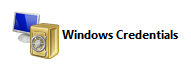
Step 2 — Open Windows Credentials
Click Windows Credentials.
Step 3 — Find Saved Network Drive and Printer Credentials
Look for entries named:
10.132.200.958827SPRINT01- Any other entries starting with:
10.1328827
These entries may be used for network drives and printer access.
Click each entry to expand it, then click Edit.
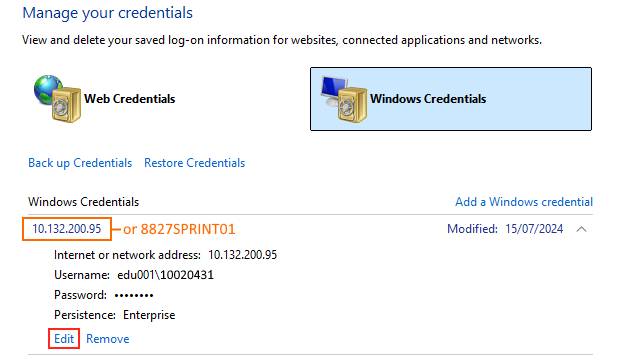
Step 4 — Update Your Password
Update the password field using your new @education or @schools password.

Username Format
Staff
edu001\username
Students
edu002\username
Click Save when finished.
Finished
Your network drives and printers should now reconnect correctly.
If you still have issues:
- Restart your laptop
- Try printing again
- Check your network drive access
- Contact the IT Department if the problem continues
Add an email account to Outlook
Windows
Back up your folders with OneDrive
Create and add an email signature in Outlook
Create and add an email signature in Outlook - Microsoft Support
Device encryption in Windows
Finding your BitLocker recovery key in Windows
How to add SharePoint document library to file explorer
https://www.youtube.com/watch?v=ihyvGX3MGUM
How to Delete a Saved Wi-Fi Network on Windows
https://www.howtogeek.com/246104/how-to-delete-a-saved-wi-fi-network-on-windows-10/
How to Disable BitLocker Encryption on Windows 10 and 11
https://www.howtogeek.com/805225/disable-bitlocker/
How To Fix The app you're trying to install isn't a Microsoft-verified app On Windows 11
How to Install Printer Windows
- Open the Run dialog: Press the Windows key and the letter "R" together (Win+R), or search for run in the Windows start menu.
- In the Run dialog box, type \\10.132.200.95 and click OK. This will connect you to the print server.
- Enter username and password: You will be prompted to enter your username and password.
- Staff: edu001\tonumber and your DE password.
- Students: edu002\username and your DE password.

-
File Explorer will open: Once you've entered the correct credentials, File Explorer will open, and you'll see a list of available printers.
Double click the 8827-Follow-Me print queue. This will initiate the installation process for the printer on your device. -
Wait for printer installation to complete.

How to Map a Network Share to a Drive Letter
🧰 What You’ll Need:
-
The path to the network share (e.g.,
\\servername\sharename) -
Optional: Username/password if required by the network share
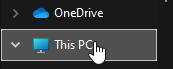
🔹 Step 1: Open File Explorer / This PC
Instructions:
-
Press
Windows + Eto open File Explorer -
Or click the folder icon in the taskbar
- If you are not already in there, In the left-hand sidebar, click on This PC

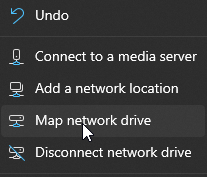
🔹 Step 2: Click "Map Network Drive"
Instructions:
-
In the top toolbar, click on the three-dot menu (
...) -
Choose "Map network drive"

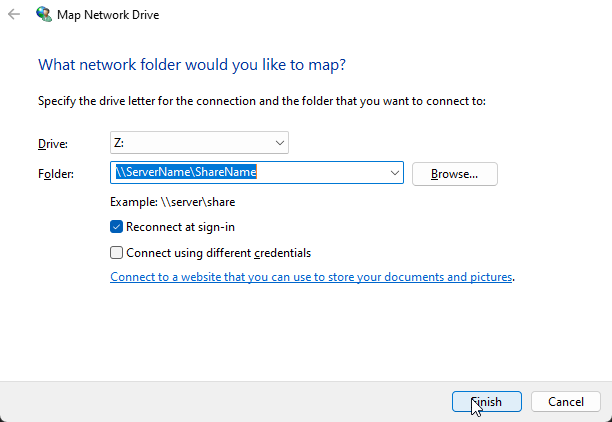
🔹 Step 3: Choose Drive Letter and Folder Path
Instructions:
-
Select an available Drive Letter (like
Z:) -
In the Folder field, type the path to the network share (e.g.,
\\ServerName\ShareName) -
Optionally, check:
-
✅ Reconnect at sign-in if you want it to persist
-
✅ Connect using different credentials if needed
-
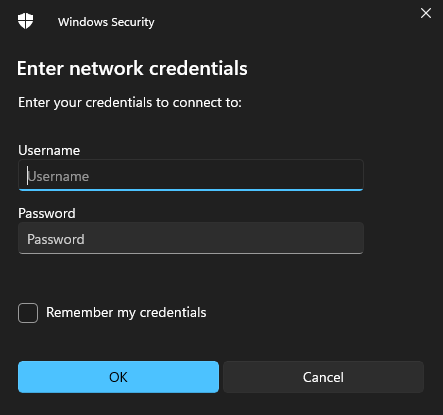
🔹 Step 4: Enter Network Credentials (if prompted)
Instructions:
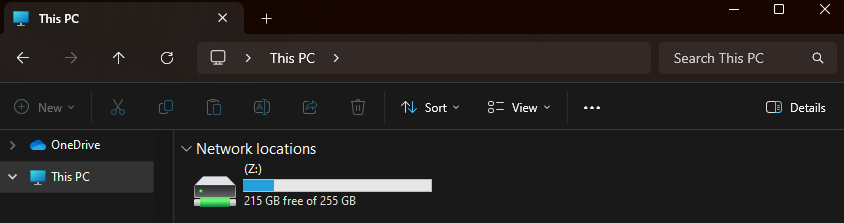
🔹 Step 5: Access the Mapped Drive
Instructions:
-
You’ll now see the new drive in This PC under Network Locations
-
You can open it just like any other folder / drive.
✅ Done!
You’ve successfully mapped a network drive to a drive letter in Windows 11. It will now show up in File Explorer every time you log in (if you selected the “Reconnect at sign-in” option).
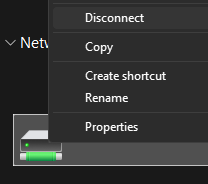
If you want to remove this mapped drive at any time, simply right click it and choose disconnect.
How to Map a Network Share to a Folder
🧰 What You’ll Need:
-
The path to the network share (e.g.,
\\servername\sharename) -
Optional: Username/password if required by the network share
🔹 Step 1: Open File Explorer / This PC
Instructions:
-
Press
Windows + Eto open File Explorer -
Or click the folder icon in the taskbar
- If you are not already in there, In the left-hand sidebar, click on This PC
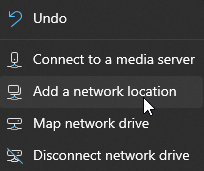
🔹 Step 2: Click "Add a network location"
Instructions:
-
In the top toolbar, click on the three-dot menu (
...) -
Choose "Add a network location"
🔹 Step 3: Choose Folder Path and Name
Instructions:
-
Follow the prompts. Click next, then next again.
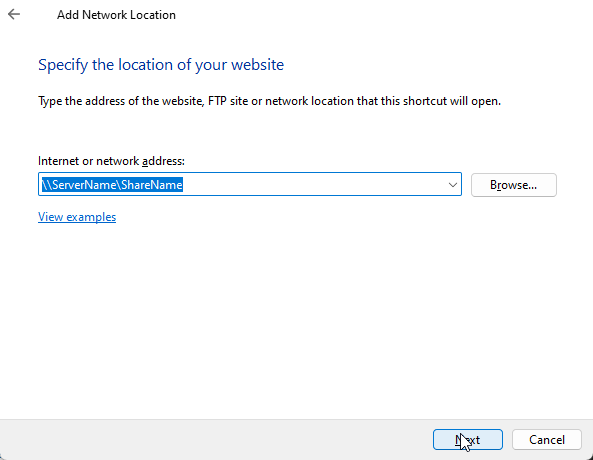
-
In the Internet or network address field, type the path to the network share (e.g.,
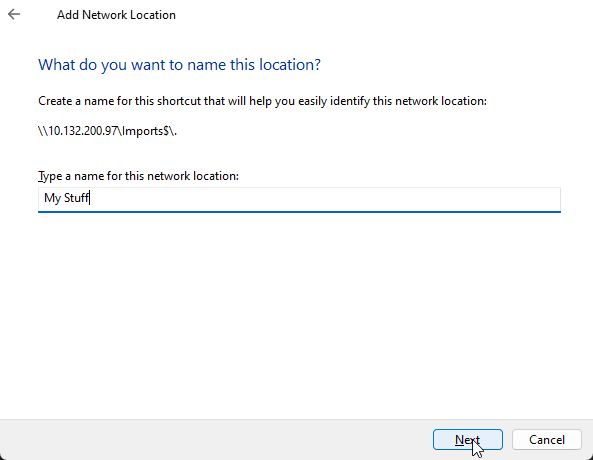
\\ServerName\ShareName) - Click next, then choose a Name to call the folder.
- Click next and then finish.
🔹 Step 4: Enter Network Credentials (if prompted)
Instructions:
🔹 Step 5: Access the Mapped Folder
Instructions:
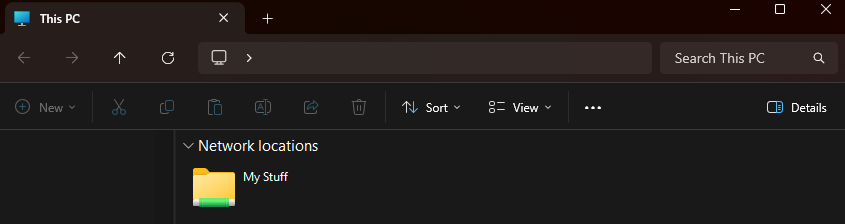
-
You’ll now see the new folder in This PC under Network Locations
-
You can open it just like any other folder / drive.
✅ Done!
You’ve successfully mapped a network drive to a folder in Windows 11. It will now show up in File Explorer every time you log in.
If you want to remove this mapped folder at any time, simply delete it like you would any other folder.
OneDrive sync problems
Switching out of Windows S mode
Task Manager No Longer opening after running NAPLAN
-
Press
Win + R, typeregedit. -
Navigate to:
HKEY_CURRENT_USER\Software\Microsoft\Windows\CurrentVersion\Policies\System -
Look for a value named
DisableTaskMgrand delete it or set it to0.
Touch Screen stopped working after running NAPLAN
- Press Win + R, type regedit, and go to:
HKEY_CURRENT_USER\Software\Microsoft\Wisp\Touch
Look for TouchGate and ensure it's set to 1 (or delete it if unsure).
Restart your PC.