Installation and Licensing Guide: RealCAD 5.5
Installation and Licensing Guide: RealCAD 5.5
Step 1: Access the Installation Files
- Open File Explorer.

- In the address bar, enter:
\\018827FS001\Programs - If prompted to log in:
- Username:
DE username - Password: Your DE password
- Username:
- Navigate to the folder
RealCAD-v5.5and open it. - Double-click
RealCAD-v5.5-Installer.exeto start the installation. - Follow the on-screen instructions to complete the installation.

Step 2: License RealCAD 5.5
- Launch RealCAD 5.5 for the first time.
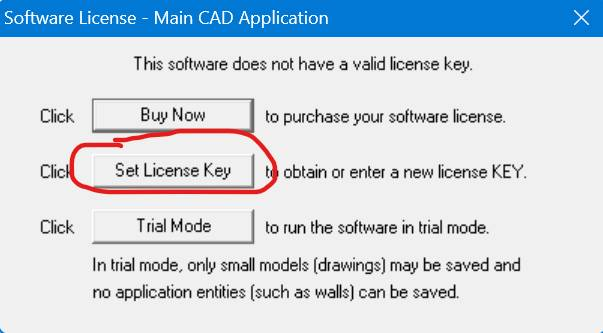
- Click Set License Key.
- Under Have you purchased?, select Yes.
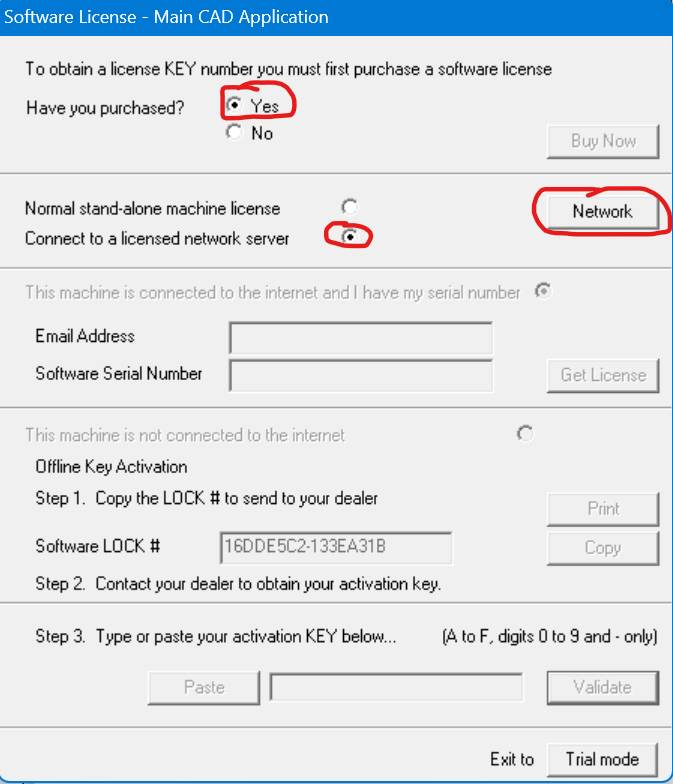
- Choose Connect to a licensed network server.
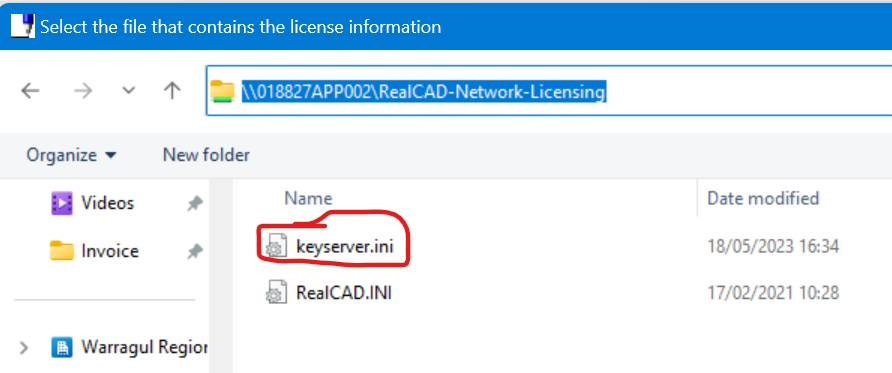
- Enter or copy the following into the address bar:
\\018827APP002\RealCAD-Network-Licensing
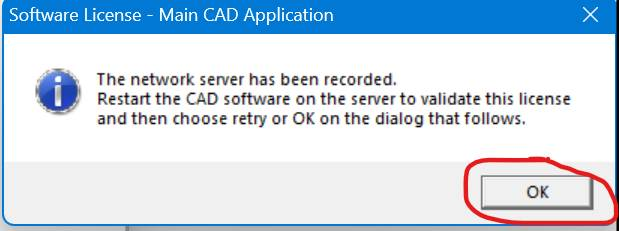
- Double-click
keyserver.ini. - Important: Do not click OK immediately. IT must restart the RealCAD 5.5 License Server to apply the license to your device. Once the license has been applied, RealCAD 5.5 is ready for use.

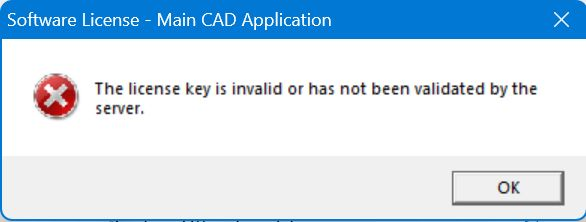
Step 3: Troubleshooting
If you receive an error message during licensing:
-
Create a support ticket: https://support.wrc.vic.edu.au/
- Sign in with your WRC account (not your email address)
-
Alternatively, email it@wrc.vic.edu.au requesting the RealCAD 5.5 License Server to be restarted.