How to Map a Network Share to a Drive Letter
🧰 What You’ll Need:
-
The path to the network share (e.g.,
\\servername\sharename) -
Optional: Username/password if required by the network share
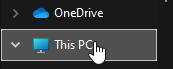
🔹 Step 1: Open File Explorer / This PC
Instructions:
-
Press
Windows + Eto open File Explorer -
Or click the folder icon in the taskbar
- If you are not already in there, In the left-hand sidebar, click on This PC

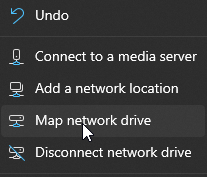
🔹 Step 2: Click "Map Network Drive"
Instructions:
-
In the top toolbar, click on the three-dot menu (
...) -
Choose "Map network drive"

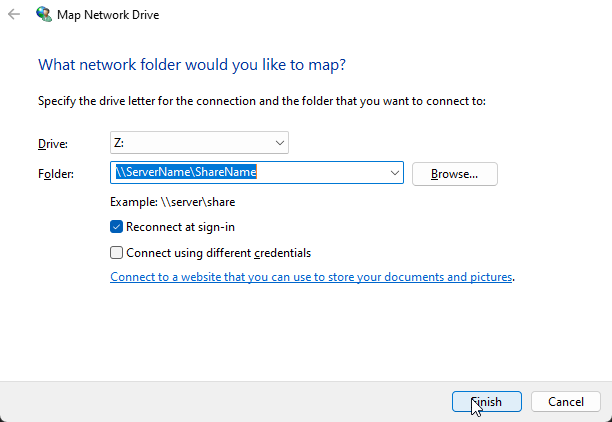
🔹 Step 3: Choose Drive Letter and Folder Path
Instructions:
-
Select an available Drive Letter (like
Z:) -
In the Folder field, type the path to the network share (e.g.,
\\ServerName\ShareName) -
Optionally, check:
-
✅ Reconnect at sign-in if you want it to persist
-
✅ Connect using different credentials if needed
-
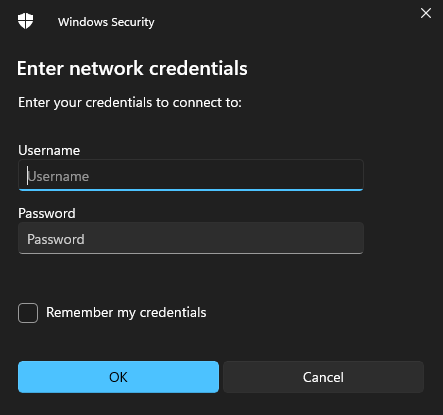
🔹 Step 4: Enter Network Credentials (if prompted)
Instructions:
🔹 Step 5: Access the Mapped Drive
Instructions:
-
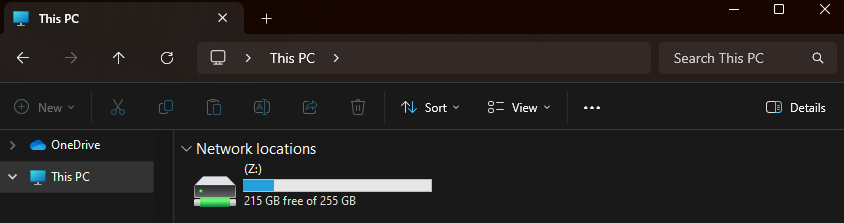
You’ll now see the new drive in This PC under Network Locations
-
You can open it just like any other folder / drive.
✅ Done!
You’ve successfully mapped a network drive to a drive letter in Windows 11. It will now show up in File Explorer every time you log in (if you selected the “Reconnect at sign-in” option).
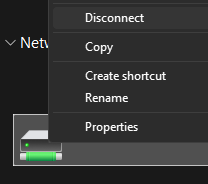
If you want to remove this mapped drive at any time, simply right click it and choose disconnect.
No comments to display
No comments to display